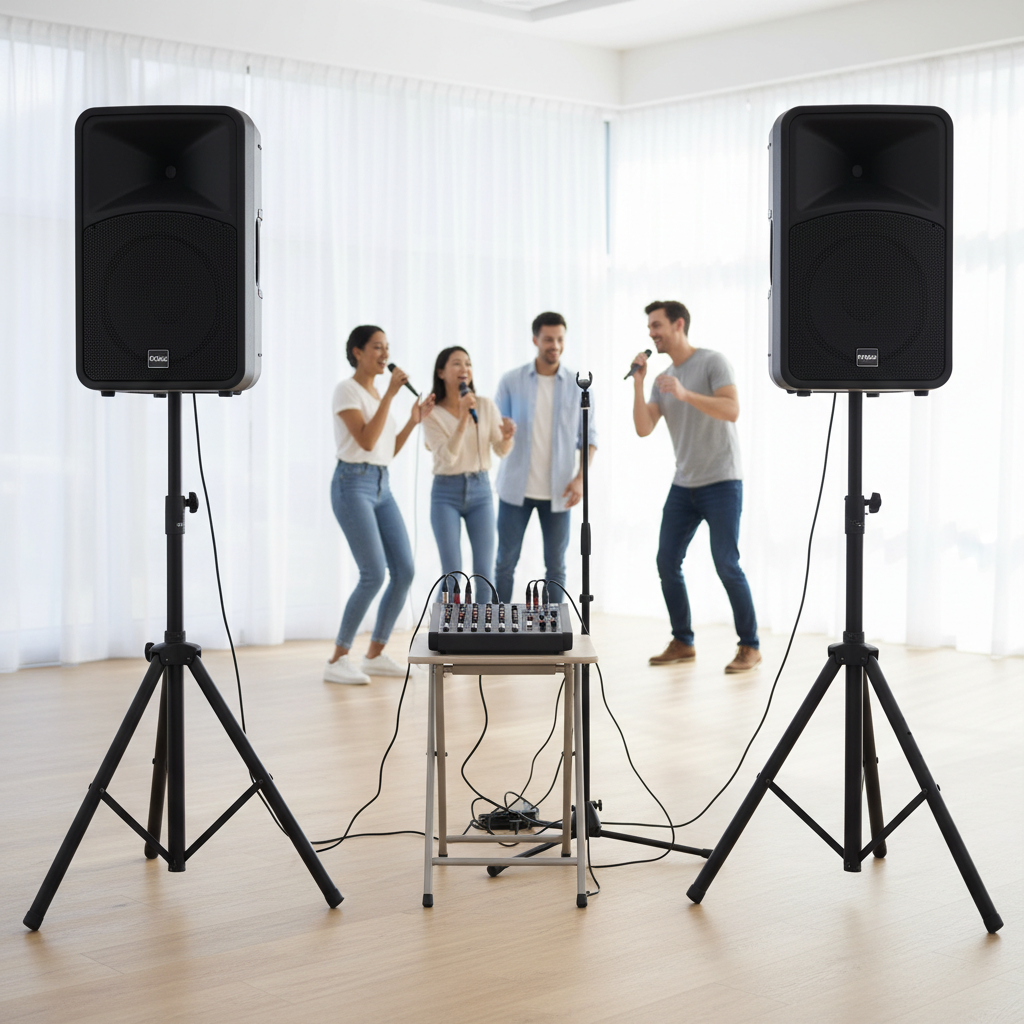
Dreaming of belting out your favorite tunes from the comfort of your living room? A dedicated karaoke machine can be a significant investment, but what if you could harness the power of your existing laptop to create an unforgettable karaoke experience? It’s not just possible; it’s surprisingly simple and budget-friendly. This guide, drawing from over a decade of hands-on experience in audio systems, particularly karaoke setups, will walk you through everything you need to know. We’ll demystify the process, from selecting the right components to troubleshooting common hiccups, helping you make the most informed decision for your perfect home karaoke system.
Factors to Consider When Setting Up Your Laptop Karaoke System
Before diving into the setup, understanding your needs and the different approaches available will help you build a system that truly shines. Consider how often you’ll use it, who will be singing, and your budget.
Types of Laptop Karaoke Setups
Your laptop karaoke journey can range from a basic plug-and-play solution to a more sophisticated setup, each offering different levels of quality and flexibility.
- Basic Setup (Laptop, Mic, Simple Speakers): This is the easiest and most affordable way to get started. You’ll use your laptop as the brain and music source, connect a simple USB microphone, and output audio to basic external speakers. It’s great for casual, impromptu sessions but might have limitations in sound quality and latency.
- Intermediate Setup (Adding a Mixer/Audio Interface): For improved sound quality and the ability to connect multiple microphones, an audio mixer or interface is a game-changer. This setup allows for better control over vocal and music levels, often with added effects like reverb. It’s ideal for small gatherings where sound clarity is important.
- Advanced Setup (External Monitor, Powered Speakers, Multiple Mics): If you’re serious about your karaoke nights, consider integrating an external display for lyrics, powerful active speakers for robust sound, and a professional-grade mixer for comprehensive audio control. This setup mimics a commercial karaoke experience, perfect for larger parties and dedicated singers.
|
Our Picks for the Best Karaoke system in 2026
As an Amazon Associate I earn from qualifying purchases.
|
||
| Num | Product | Action |
|---|---|---|
| 1 | VOSOCO Karaoke Machine with 2 Wireless Microphones, Portable Bluetooth Speaker for Adults Kids, PA Systems Support TWS Echo Adjust TF USB AUX for Home Party Outdoor Travel |

|
| 2 | Karaoke Machine for Adults, Built-in 10.1" HD Lyrics Screen, Supports WiFi Bluetooth HDMI USB and TF, Portable Karaoke Player with 2 Wireless Microphones for Home Party Family Gathering |
|
| 3 | NBVOICE Professional Portable All-in-One Integrated 2-Way PA System Fixed Setup, Suitcase Design w/ 8-Channel Mixer, 2 Speaker Stands, Bluetooth, Mic for Performances, Presentations |
|
| 4 | JBL Wireless Two Microphone System with Dual-Channel Receiver, Black |
|
| 5 | Portable Karaoke Machine, with Wireless Microphones, Bluetooth Party Speaker with LED Lights, Loud Subwoofer, USB/AUX, Outdoor Karaoke Speaker for Adults & Kids, Home & Party |
|
| 6 | Karaoke Machine, Portable Bluetooth 5.3 Speaker with 2 Wireless Microphones for Adults, PA System with Pitch Correction & Echo Adjustment, Supports TWS/TF Card/USB/AUX/Live for Home Party (2MICS) |
|
| 7 | Ikarao Portable Karaoke Machine for Adults, Built-in Lyrics Display and Screen, 2 Self-Charging Wireless Microphones, Karaoke App, 140W Speaker, Connects to TV for Home Party Birthday Outdoor Camping |
|
| 8 | Karaoke Soundbar with Subwoofer for TV: Sound Bar with 2 Wireless Microphones - Home Theater Surround Sound System - Bluetooth Speaker with Remote Supports HDMI ARC/Optical/AUX/USB for TV/PC |
|
| 9 | Ikarao Smart Karaoke Machine for Adults - with Lyrics Display, 32GB Karaoke Tablet, 2 Wireless Mics, Professional Karaoke System, 300W Peak Power, 4 DJ Lights, Karaoke Speaker for Any Occasion |
|
| 10 | Karaoke Machine, Portable Bluetooth Speaker with 2 Wireless Microphones for Adults & Kids with Lights, Karaoke Microphone with PA System Supports USB/TF/REC/FM/AUX for Home Party Home System Packages |
|
Key Components of a Laptop Karaoke System
Every effective laptop karaoke system relies on a few core pieces of equipment. Getting these right is crucial for a smooth and enjoyable singing experience.
- Laptop: This is your central hub, running the karaoke software and providing the audio/video output. Ensure it has enough processing power for your chosen software and the necessary ports (USB, HDMI, audio jack).
- Microphone: Forget your laptop’s built-in mic; it will lead to poor sound and feedback. An external microphone is essential. Wired USB microphones are convenient for basic setups. For better quality and less latency, XLR microphones paired with an audio interface or mixer are preferred. Consider a wireless microphone for freedom of movement.
- Audio Output: While your laptop’s speakers can play music, they generally aren’t powerful enough for karaoke vocals. External speakers, a soundbar, or a home theater system will provide the necessary volume and clarity for both music and vocals. Powered (active) speakers simplify setup as they don’t require a separate amplifier.
- Audio Mixer or Interface: This component, crucial for intermediate and advanced setups, blends your microphone’s input with the music from your laptop. A physical mixer allows you to adjust volume levels independently, add effects like reverb, and route the combined sound to your speakers, minimizing latency issues often found when trying to mix directly within the laptop. An audio interface serves a similar purpose, converting analog microphone signals into digital ones for your laptop, especially for XLR mics.
- Cables and Adapters: You’ll need various cables: AUX cables for connecting your laptop to speakers/mixer, USB cables for microphones or interfaces, and HDMI cables if you plan to use an external monitor for lyrics. Ensure you have the correct adapters for different port types on your laptop and audio equipment.
- External Display (Optional): Projecting lyrics onto a larger screen like a TV or projector significantly enhances the experience for singers and the audience. This typically connects via an HDMI cable from your laptop.
- Karaoke Software/Platforms: This is where the magic happens, providing the music, lyrics, and often features like pitch control and vocal effects. Options range from free online platforms to robust paid software.
Comparing Popular Karaoke Software and Platforms
The right software can make or break your karaoke night. Here’s a look at some popular choices, each with unique advantages.
- YouTube: A go-to for many, YouTube offers an incredibly vast, free library of karaoke tracks. Simply search for “[Song Title] karaoke” and you’ll find countless options. Its main drawbacks are the lack of dedicated karaoke features like pitch control or singer queues, and you’ll need to manually adjust volume levels between the music and your microphone.
- KaraFun: This is a highly popular subscription-based service known for its extensive, licensed catalog and professional features. KaraFun offers dual-screen display, customizable lead and backing vocals, tempo and key control, and even offline syncing of songs. A free player version with limited features is available.
- Kanto Karaoke: Available as both a free and paid license, Kanto Karaoke is a versatile player that supports multiple karaoke file formats (MP3+CDG, MP4, MIDI). It includes recording functionality, vocal effects like reverb and echo, and a dual-screen mode. The paid version unlocks advanced features like a web browser for online tracks and singer playlist management.
- Dedicated Karaoke Hosting Software (e.g., PCDJ, Siglos, OpenKJ): These programs are designed for more serious karaoke hosts. They offer comprehensive features for managing large song libraries, singer rotation, key/tempo changes, and professional audio controls. OpenKJ is a notable free option for Windows that helps organize song collections.
Detailed Comparison of Karaoke Software Options
To help you choose, here’s a side-by-side comparison of different software options for your laptop karaoke system:
| Feature | YouTube | KaraFun | Kanto Karaoke | Dedicated Software (e.g., OpenKJ) |
|---|---|---|---|---|
| Price | Free | Free/Subscription | Free/Paid License | Free/Paid License |
| Song Library | Vast, user-uploaded | Licensed, extensive | User-managed/Online | User-managed |
| Offline Play | Limited | Yes (with subscription) | Yes | Yes |
| Vocal Removal | No (rely on tracks) | Yes | Yes (limited free) | Varies |
| Vocal Effects | No | Yes | Yes (reverb, echo) | Varies |
| Dual Screen | Manual setup | Yes (built-in) | Yes (built-in) | Yes |
| Singer Queue | Manual | Yes | Yes (paid version) | Yes |
Guide to Setting Up Your Laptop Karaoke System
With your components in hand, let’s get everything connected and ready for a singing session.
- Step 1: Gather Your Hardware
Lay out your laptop, microphone(s), speakers, mixer (if using), external display (if using), and all necessary cables. This helps visualize the connections and ensures you have everything before you start. - Step 2: Install and Configure Your Microphone
Plug your microphone into your laptop. If it’s a USB mic, simply connect it to an available USB port. If it’s an XLR mic, connect it to your audio interface or mixer, then connect the interface/mixer to your laptop via USB.- Windows Settings: Go to
Settings > System > Sound. Under “Input,” ensure your microphone is selected. ClickMore sound settings, then select your microphone, clickProperties, go to theListentab, and checkListen to this deviceto hear yourself through your speakers. Adjust the volume in theLevelstab. - macOS Settings: Open
System Settings > Sound > Input. Select your microphone. To hear yourself, openQuickTime Player, go toFile > New Audio Recording, and adjust the volume slider.
- Windows Settings: Go to
- Step 3: Connect Your Audio Output
Connect your laptop’s headphone jack (audio out) to the audio input on your external speakers or mixer using an AUX cable. If using a mixer, ensure the mixer’s main output is connected to your speakers. Adjust the volume on your speakers or mixer to a comfortable level. - Step 4: Set Up Your Karaoke Software
Launch your chosen karaoke software (e.g., KaraFun, Kanto Karaoke). In the software settings, verify that your microphone is recognized as the input device and your external speakers/mixer as the output device. If using YouTube, open your browser, search for karaoke tracks, and adjust the YouTube video’s volume relative to your microphone’s input via your mixer or laptop sound settings. - Step 5: Optimize for an External Display (Optional)
Connect your laptop to a TV or projector using an HDMI cable. Most operating systems will automatically extend your display. In your karaoke software, select the option to output lyrics to the second screen. This allows singers to see lyrics clearly while the laptop remains free for song selection and control.
Common Issues When Using a Laptop as a Karaoke Machine and How to Fix Them
Even with the best planning, you might encounter a few hurdles. Here’s how to troubleshoot common problems.
- Audio Latency/Delay: This is a frequent challenge where your voice sounds delayed compared to the music. It often occurs when the laptop tries to process and mix the microphone input and music digitally.
- Fix: The most effective solution is to use a dedicated physical audio mixer. This hardware mixes the microphone and music signals before sending them to your laptop or speakers, minimizing digital processing delay. Some advanced users might explore ASIO drivers for Windows, which reduce audio latency for compatible hardware and software.
- Microphone Feedback: That piercing screech is usually caused by your microphone picking up the sound from your speakers, creating a loop.
- Fix: Position your speakers in front of or to the sides of the microphone, not behind it. Reduce the microphone gain or speaker volume. If using a mixer, use its equalization (EQ) controls to cut problematic frequencies. Ensure your external speakers are capable of handling microphone input without distorting easily.
- No Sound or Poor Audio Quality: If you can’t hear anything or the sound is distorted, several factors could be at play.
- Fix:
- Check Volume Levels: Ensure all volume controls are up—on your laptop (system and app), on your mixer, and on your speakers.
- Verify Output Device: In your laptop’s sound settings, confirm that the correct external speakers or mixer are selected as the default output device.
- Check Cable Connections: Ensure all cables are securely plugged into the correct ports. Try swapping cables if you suspect a faulty one.
- Update Drivers: Outdated audio drivers can cause issues. Check your laptop manufacturer’s website for the latest sound drivers.
- Disable Enhancements: Sometimes, audio enhancements in your laptop’s sound settings can interfere. Try disabling them.
- Fix:
- Incompatible Hardware/Software: Not all devices or programs play well together.
- Fix:
- Check System Requirements: Always verify that your karaoke software is compatible with your laptop’s operating system.
- Port Specifics: Be aware that some newer laptops have combined headphone/microphone jacks. You might need a splitter adapter to use separate headphones and microphones. If your mic isn’t working with a combo jack, a USB microphone or audio interface is a reliable alternative.
- Fix:
Conclusion
Transforming your laptop into a full-fledged karaoke machine is a rewarding endeavor that brings endless entertainment to your home. By understanding the key components—a reliable laptop, a quality external microphone, suitable external speakers, and the right software—you can create a setup perfectly tailored to your needs and budget. Whether you opt for a basic YouTube-driven session or a professional-grade setup with a mixer and dedicated software, the joy of singing along to your favorite tracks with friends and family is now more accessible than ever. So, gather your gear, choose your playlist, and get ready to hit those high notes! What song will be the first to grace your new laptop karaoke stage?
Frequently Asked Questions
Can I use my laptop’s built-in microphone for karaoke?
It is strongly advised against using your laptop’s built-in microphone for karaoke. These microphones are designed for voice calls, not singing, and will likely produce poor sound quality and feedback, leading to a frustrating experience. An external microphone is essential for clear vocals.
What’s the best free karaoke software for a laptop?
For a vast and easily accessible song library, YouTube is an excellent free option, though it lacks advanced karaoke features. If you prefer a dedicated application, options like KaraFun Player (free version with limited features) or Kanto Karaoke (free version) offer better functionality for managing songs and displaying lyrics.
How do I connect multiple microphones to my laptop for karaoke?
To connect multiple microphones, you’ll need an audio mixer or an audio interface with multiple microphone inputs. Each microphone (preferably XLR) plugs into the mixer, which then connects to your laptop via USB or an audio output cable. The mixer allows you to control each microphone’s volume independently.
Why is there a delay between my voice and the music when I sing?
This common issue, known as audio latency, occurs when your laptop’s internal processing struggles to mix your live microphone input with the music in real-time. The best solution is to use an external physical audio mixer, which handles the audio blending outside of your laptop, significantly reducing or eliminating the delay.
Can I use my TV as a second screen for karaoke lyrics?
Yes, absolutely! Connecting your laptop to a TV or projector via an HDMI cable is a fantastic way to display lyrics on a larger screen, making the karaoke experience much more enjoyable for everyone. Most karaoke software offers a “dual-screen” mode specifically for this purpose.